I haven't started this tradition with my own kids yet, but i plan to this year. However, this was a tradition for many years in my family-until our hands pretty didn't change anymore. ;) I remember taking out the "hands" every year and hanging them on the tree and marveling at how small we all once were! its a great tradition to start when they are small!
Supplies:
Cardboard
Wrapping Paper-or other embellishment
Glue
Ribbons or string to hang them on the tree
Instructions:
Trace each child's hand onto the cardboard and cut it out. Embellish it as you wish, gluing wrapping paper, or having the child decorate it. Make sure you note on the opposite side the child's name and the year! Its a great reminder of how quickly they grow! And this one is not quite as messy as the dough ornaments.
Also a great gift for grandparents-and inexpensive and easy to do multiples!
Showing posts with label Christmas. Show all posts
Showing posts with label Christmas. Show all posts
Monday, December 6, 2010
cookie cutter wrapping paper
Ella and I took on this project-and it turned out to be much easier than i expected, however not as pretty as i had hoped. Ahh, such is crafting with a 4 year-old! But its super easy and a great way to wrap gifts-especially for friends and grandparents-who have much less discriminating wrapping appreciation! And depending on how long you let it last, the clean up isn't too bad.
Cookie Cutter Wrapping Paper:
Large Sheets of Craft Paper-any color
Cookie Cutters
Paint-finger paint, acrylic, fabric-anything that will work on paper!
Use the cookie cutters as stamps and dip them in the paint and stamp them onto the paper. I tried construction paper, and depending on the paint-we used acrylic-it still will show up even on black paper! I suppose you could also decorate fabric as well to use as napkins or gift wrap!

And wrap your gifts! A perfect way to get the kids excited about giving a gift!

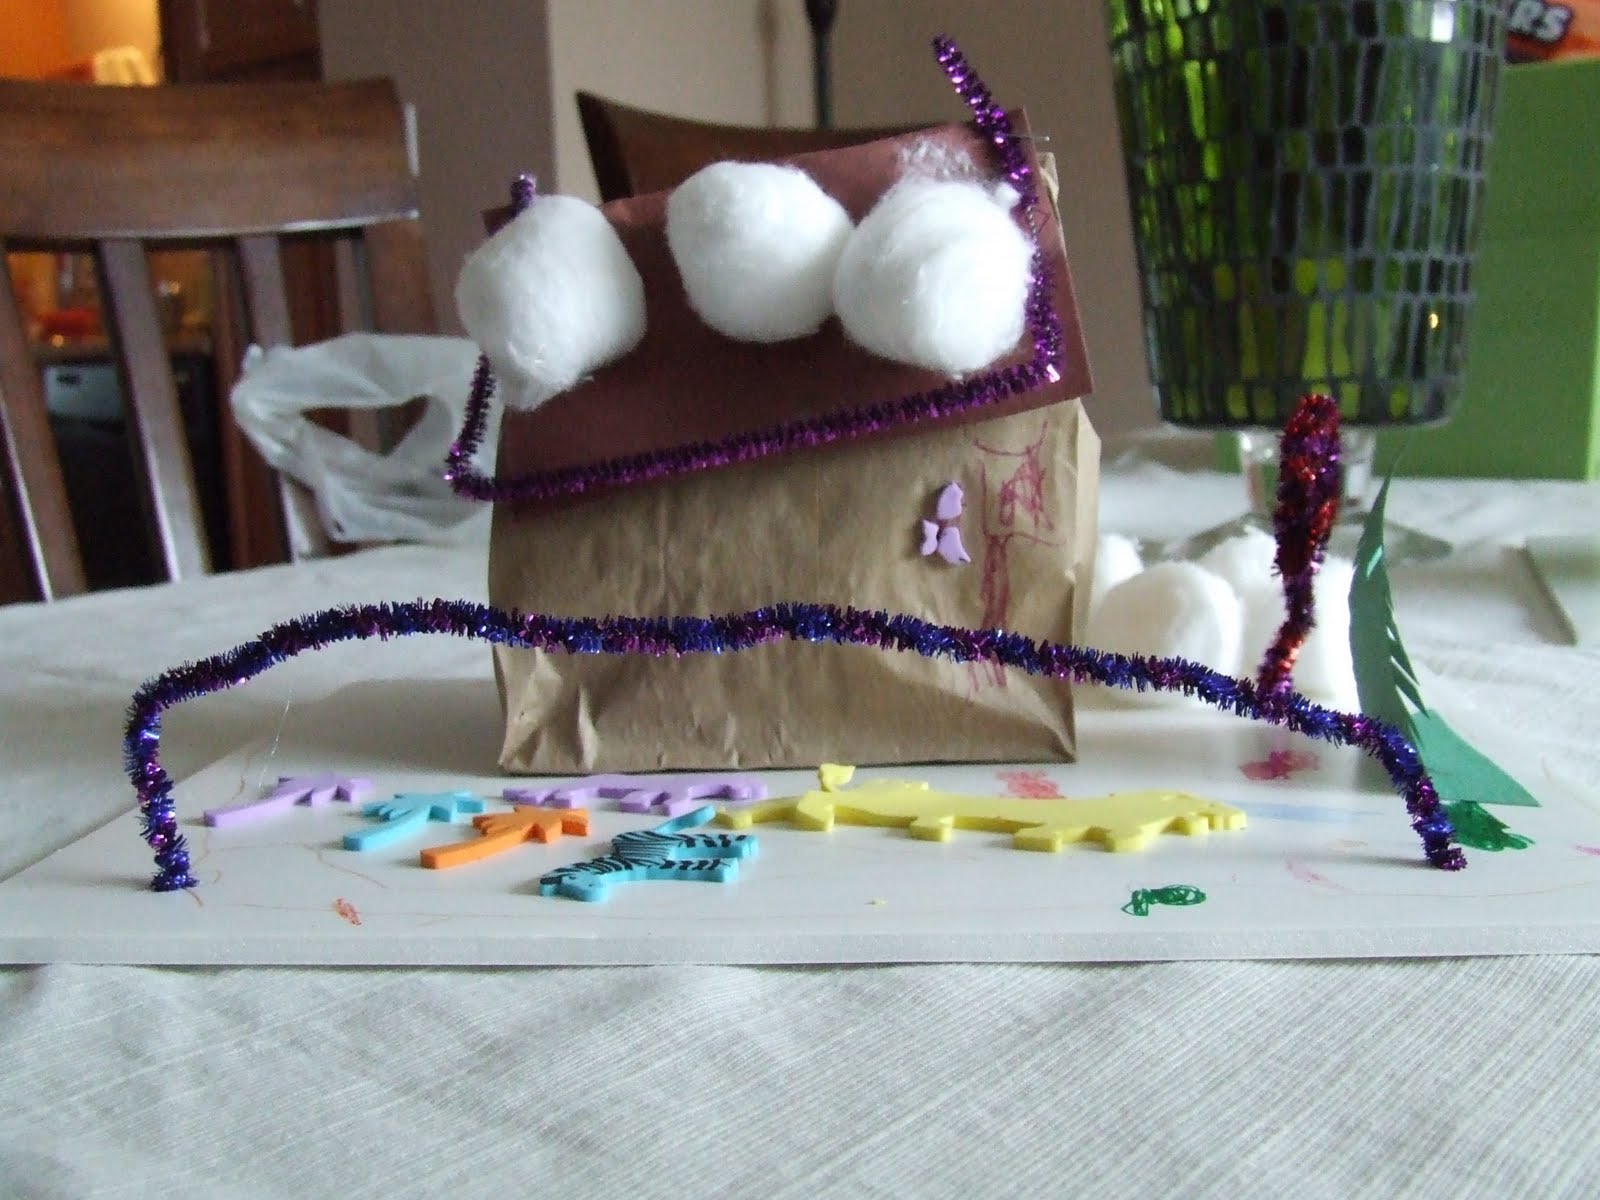
brown paper "gingerbread" houses
we endeavored to make these and while i was envisioning something a little more festive and decorated, i fought every urge to add to them once the children were napping! ;)
i did a single bag version-i didn't glue on a second bag, but we used construction paper and glued it on the top as a roof.

i did a single bag version-i didn't glue on a second bag, but we used construction paper and glued it on the top as a roof.
Approximate Time: 1 hour
Supplies:
- glue
- 2 paper bags
- markers
- paints
- felt
- shredded paper
- pipe cleaners
- buttons, poms, poms or any misc tidbits you have
Instructions:
First open lunch bag and fill with stuffing,paper, or shredded paper, I used my shredded waste paper. Fold top over like if you had a lunch in it. Staple the fold down on each end. Take second lunch bag leave unopened. Cut off the fold so that the bottom part is off. Glue over the other bag so it resembles a roof.Now let you imagination go wild. Use any scraps, buttons, felt, poms poms you have to decorate the bag to look like a gingerbread house. We glued our "houses" onto small pieces of foam board so they could also decorate that!

Thursday, December 2, 2010
Potato Stamped Wrapping Paper
You'll need:
- Paints
- A sponge, cut in half
- A potato
- A knife
- A marker or pen
- Paper

Step one
Cut the potato in half.Step two
Draw your desired shape on a piece of paper (it helps to trace around the potato face-down on the paper first so you can fit the shape exactly into the potato's circumference.Step three
Cut around the shape from the top and a few millimeters down the potato too so the shape rises from the rest of the potato.Step four
Place the sponges on a small plate and squirt paint onto each sponge. Let the kids loose with the stamps on a large sheet of butcher's paper or craft paper (we used the Ikea paper rolls). Leave to dry then wrap!From: http://www.kidspot.com.au/Christmas-Christmas-crafts-Potato-stamped-wrapping-paper+3708+117+article.htm
Saturday, November 13, 2010
Shape Christmas Tree

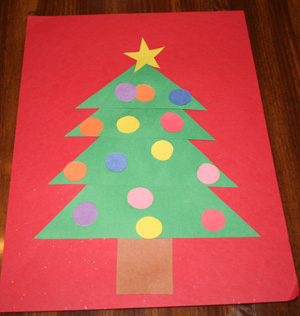
What you'll need:
- Construction paper
- shape Christmas tree template
- Scissors
- Glue stick
- Print our template and cut the pieces out. The triangles (tree parts) should be green, the star should be yellow, the rectangle should be brown and the circles should be all different colors.
- Glue the triangles to a full sheet of construction paper. Start with the largest one and work your way up to the smallest triangle on the top of the tree.
- Glue the rectangle (trunk) to the bottom of the tree.
- Glue the ornaments onto the tree and then glue the star on top.
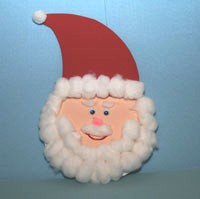
Cotton Ball Santa
What you'll need:
|
Subscribe to:
Posts (Atom)


